Making a fabric bead...
Part 1
What you need:
- piece of colourful fabric
- small stir stick straws, drinking straws or skewers
- double sided contact tape. (Scor tape scor-pal.com/scor-tape) or fabric glue
- cutting mat, rotary cutter and ruler or a sharp pair of scissors.


Placing the double sided scor tape on the fabric top and bottom. If you are using glue put a small bead line of glue where the tape is .
 Remove the tape and place the coffee straw on the sticky tape and start to tightly roll the straw up to the top tap. Remove top tape and finish rolling.


I didn't do this in the picture above but I would use my rotary cutter to make a clean cut on both ends first. Or you can use scissors for this. Don't use your best blade or scissors for this!
 Here is a finished set of beads. 2 one inch beads and 5 half inch beads.
There is more that I do to the beads or you can use them like this.
Fabric Beads Part 2


Part 1
What you need:
- piece of colourful fabric
- small stir stick straws, drinking straws or skewers
- double sided contact tape. (Scor tape scor-pal.com/scor-tape) or fabric glue
- cutting mat, rotary cutter and ruler or a sharp pair of scissors.

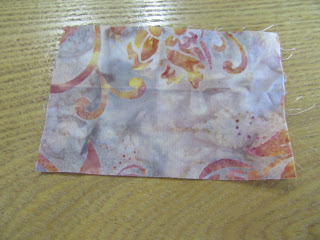
Choose a piece of fabric that is colourful. Batiks work great. Use up pieces that you may have saved. This is one way I use up my scraps. Cut the fabric the length of your straw or skewer.

These are some straws I have collected from my wanderings. Recycling all those coffee straws or you can buy a box of them at a place that sells restaurant supplies or coffee supplies for business.

Placing the double sided scor tape on the fabric top and bottom. If you are using glue put a small bead line of glue where the tape is .


You should now have a covered straw. To cut the piece into individual bead. Place a ruler beside the straw and vision how long you want your bead.

I didn't do this in the picture above but I would use my rotary cutter to make a clean cut on both ends first. Or you can use scissors for this. Don't use your best blade or scissors for this!

There is more that I do to the beads or you can use them like this.
Fabric Beads Part 2

This is what the fabric bead looks like not embellished. And they are attractive on their own.
But I like to wrap a bit of thread around the bead to give it some extra zing.

Here comes in all the yummy threads you bought and haven't done much with since or the left over bits on a spool you don't know what to do with.
I put the threads in this box with a magnetic closer so I can store it my sewing lair or in the living room with out it looking to messy. Since I also take it along to work on while driving trips ( to avoid watching the crazy traffic while my husband drives) the threads and supplies are contained and don't drop all over the floor of the car. Experience is a great teacher!

You could use glue but I hate sticky and glue finds its ugly head all over the place if I use it. So I thread up a needle. I usually double up the thread and knot it at the end for better bead coverage.
I start at one end of the bead going between the layers of fabric (missing the plastic straw if you use that ) up to the top surface and take a small back stitch.
I make sure the thread does not pull out at this time. Then I start wrapping down the length of the bead.

Somewhere around the middle I take another small back stitch to keep the thread taught.
Wrap to the end and use another back stitch. Wrap back to the other end wrapping and back stitching.
There is no right or wrong about how much thread you use. Just it is nice if you have enough thread to go up and back on the same bead.
If you don't make it to the end tie off with a few back stitches and add a new piece of thread.

At the end of the bead go down through a few layers and make some tiny back stitches between the layers and tie off the thread inside. I
In time you will get speedier and neater.
There is no right or wrong way of doing this. It is for fun!

Here are two finished beads that took me a short time to create.
Other ways to decorate the bead include beads in a bottle, adding small seed beads, pre stamping or colouring the fabric.
No comments:
Post a Comment