Posts on Discharge Dyeing and deColourant.
Posted December 2015.
Al Cote is a very talented artist
One of the techniques we played with at a retreat he hosts was deColourant. This is not just the spilling of bleach onto your clothes and "making lemonade out of a lemon" But acutely products that you can use more safely that household bleach for your fabric and your own health. Here is s a link to learn more about it and its properties. http://www.dharmatrading.com/paints/decolourant-and-decolourant-plus.html
These products can be stenciled, painted, stamped, ragged etc on your fabric.
Then they are left to dry. And then processed as per the products instructions.
Here are some pictures of the decolourant that we played with on that day.


Discharge Dyeing with deColourant, deColourant Plus (no longer made) and a Bleach Pen.
.
Posted December 2015.
Al Cote is a very talented artist
One of the techniques we played with at a retreat he hosts was deColourant. This is not just the spilling of bleach onto your clothes and "making lemonade out of a lemon" But acutely products that you can use more safely that household bleach for your fabric and your own health. Here is s a link to learn more about it and its properties. http://www.dharmatrading.com/paints/decolourant-and-decolourant-plus.html
These products can be stenciled, painted, stamped, ragged etc on your fabric.
Then they are left to dry. And then processed as per the products instructions.
Here are some pictures of the decolourant that we played with on that day.
 |
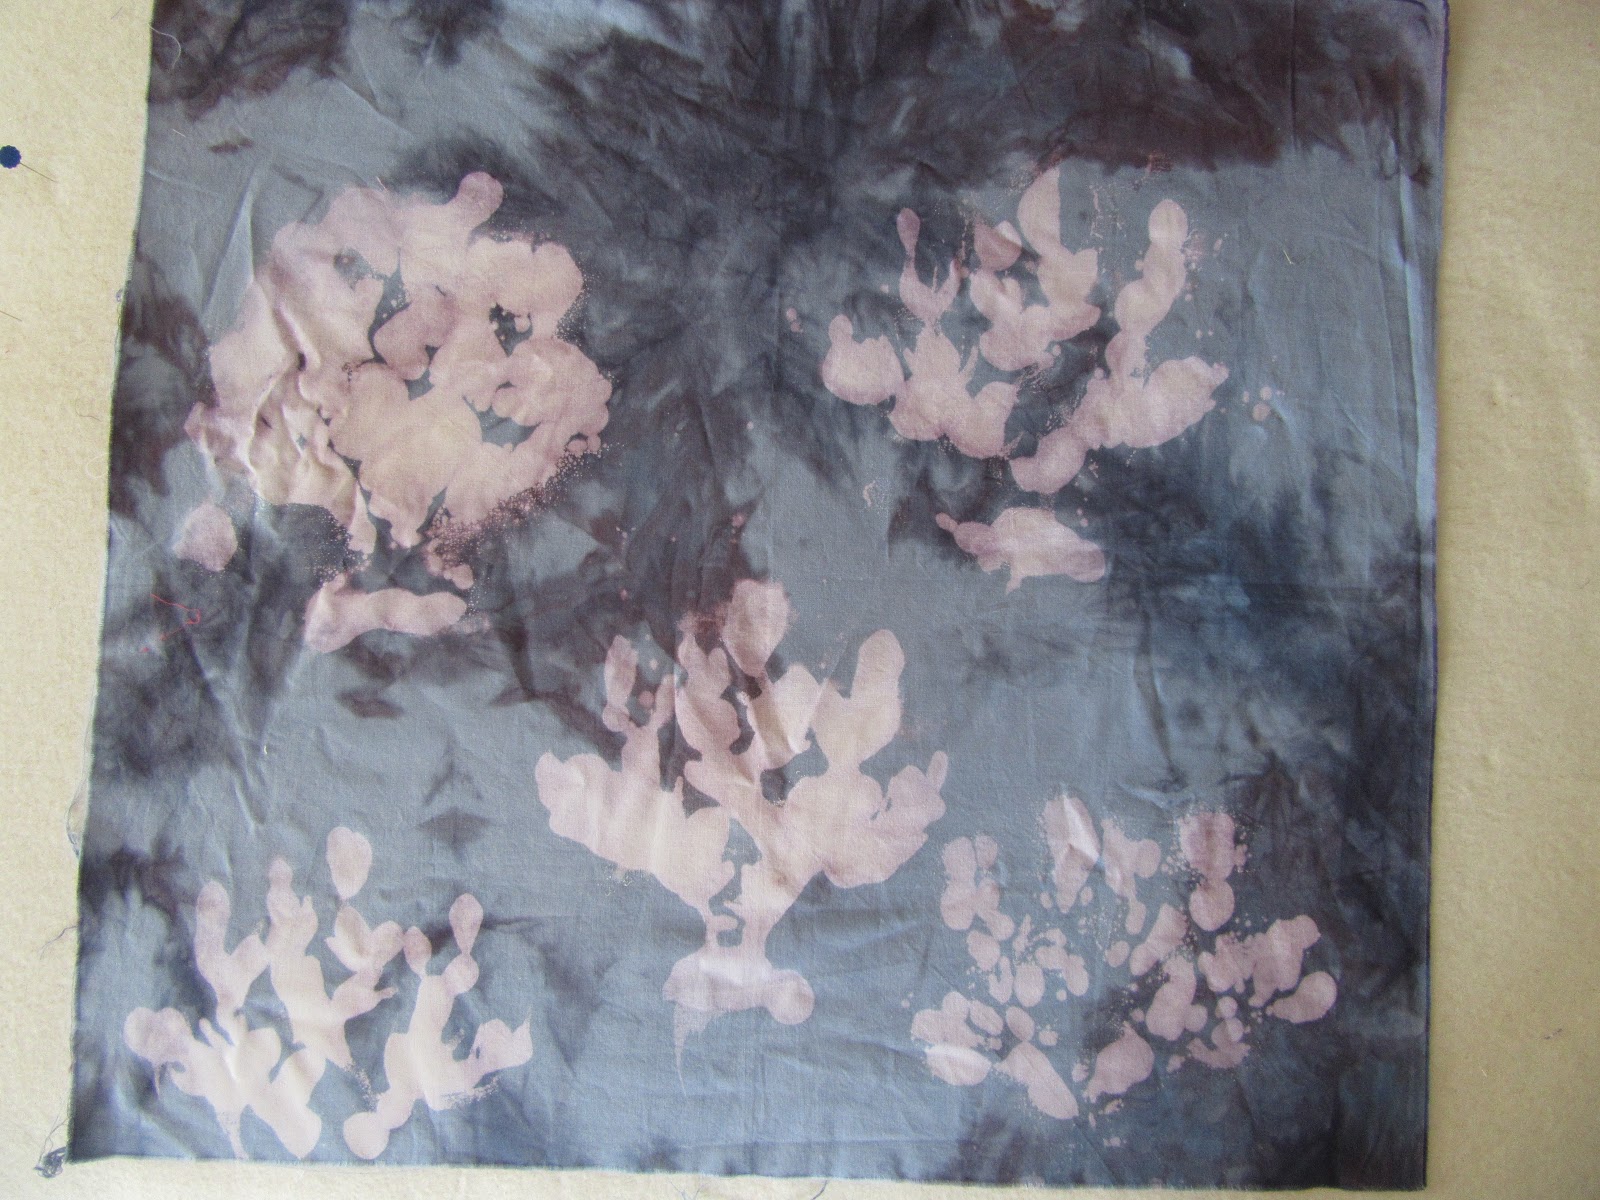
| Before... deColourant added to fabric. These have the "coloured deColourants" added. |
 |
| After the deClourant was ironed and washed out. |

and some more
 |
| Before and after |
 |
 |
| after only |
 |
| Before and After |

 |
| After only |

After only.
It was a quick and easy surface design trick to have up your sleeve....
Posted July 6, 2017
Discharge Dyeing with deColourant, deColourant Plus (no longer made) and a Bleach Pen.
 |
| deColourant Plus on various fabrics using a wooden Stamp and a foam stamp. I can't say I was impressed with the deColourant plus. The purpose of this paste is to remove the colour from the fabric and then to add back the colour of the paste. In this case blue. Back row fabric: Commercial Batik, Hand dyed black, blue hand dyed flannel, hand dyed red/pink on cotton, and the Front row: Two commercial cotton fabrics. The foam stamp was the stamp that shows up the best. |
 |
| This was the same fabrics (mostly) using the same stamps and used the deColourant. deColourant is a product that removes colour from a fabric in a past form. Back Row: Batik, hand dyed black, commercial cotton Front Row: Hand dyed blue flannel, hand dyed cotton pink/red Here the deColorant worked on all but the flannel. |
 |
| deColourant plus in Silver (discontinued) It seemed to work on all the fabrics but not as well as the flannel. Back row: Batik, black hand dyed, blue flannel, red/pink hand dyed Front Row: Two commercial cottons. |
 |
| Here I use the Blue and Silver deColourant on the first two pieces and the plain deColourant. All were the same commercial cotton. But this time I used a stencil and applied the deColorant with a brush. |
 |
| This was a piece of commercial fabric that I played with a bleach pen with. The bleach pen removes the colour well but a halo effect can be seen. It is hard to get the bleach to flow evenly. |
July 11, 2017
This post is following along in some experiments that I did with some friends last Spring.
Testing a few samples of different scrunched fabric in a dilute dye bath of bleach and water
Next I tried using a mask of plastic mylar leaf shapes I traced from real leaves on a piece of the same black/blue fabric I used in the dye bath of bleach solution. I painted on deColourant everywhere the mask was not.


 Finally I tried stencils. These were done differently. The one above was done with a stencil and spraying deColourant Mist onto the fabric. It makes an interesting loose design of the tree stencil. The stencil was not fixed down but used and sprayed a few different time. Not could if you want a tight design.


 |
| This was a piece of commercial fabric that I scrunched and put in a container adding bleach water. This blue/black material turned into the most amazing mottled brown. This would make great dirt fabric or tree bark. |
 |
| This was a hand dyed piece of cotton. It did not dye brilliantly and I did not really like it. When the fabric was put into a dilute bath of bleach water. I still did not like it. Not enough change to make it interesting or a nice colour. |
 |
| This was another piece of hand dyed fabric. The shade of grey that was created in the bleach water dye bath I like better than the original fabric. Great for rocks, stones, etc. Notes: After putting in a dilute bath of chlorine bleach you must neutralize the bleach. There are two ways that I have read you can do this. Purchase a product called Anti chlor from a dye company or other source or Rinse with clear water then put in a hydrogen peroxide My source for this information came from wikihow.com/Neutralize-Bleach and this is what I followed. Please research the proper ratios and what to do! These are chemicals and should not be done without safety precautions of gloves, respirators, proper ratios and in a well ventilated room . |

It created a very nice outline. Again I used the deColourant as per the instructions on the manufactures jar.
Note: I really liked this effect and could see using this with different masks in more work.

These two pieces I used deColourant on hand dyed fabric. I painted the deColourant onto a foam stamp I made from craft foam and my own leaf tracings. Very easy to create a stamp out of fun foam from your local dollar or craft store. A unique stamp the at you can use in your art and not cost alot!

I loved the different definition of the veins in the leaves.
Note: This is a technique I would use again. Inexpensive, graphic results and nice contrast.

This next design was used through the same stencil using deColourant Paste. It has much more control. The paste does not wick through the fabric but stays in place to take the colour out where you placed it.
Note: Use the mist when you want a looser design. Because it is not as dense it wicks through the fabric. The past definitely can be controlled better for crisper lines.

Here is a sample of the stencil used with the mist (if I remember correctly) Shelley made this. It has a loose interesting effect.

This final piece I love! And I did not do it! Shelley did this piece by using different items as resists and then placing the fabric in a bleach solution. It is truly fabulous. I know she used cloth pegs to make some of the marks and wrapping up a stone with an elastic for others. One of the interesting designs in the circle shape was using dissolvable packing peanuts! Who knows what you can use.
This is just a tiny step in what you can do with deColourant and colour removal products.
How to source what you use.
Ask for deColourant at your local fibre art store, google on line, dye suppliers
Bleach Pens in the laundry section of your grocery store
Bleach from your local grocery store
Hydrogen Peroxide 3% from your local drug store.
In all things be safe and read directions. Have a healthy respect for chemical.
Will I use this...?
Definitely put in the tool box of make making when wanting a specific effect.
I would probably use the deColourant over bleach because it is easier to control and the smell doesn't bother me to much.
No comments:
Post a Comment